Getting Started with nsGPT
Your AI-powered NetSuite assistant is just a few steps away. Follow this guide to install and start using nsGPT in your NetSuite environment.
Before You Begin
Make sure your nsGPT account has been provisioned. You should have received a confirmation email with your account details and login credentials.
Bundle Installation
Follow these steps to install the nsGPT bundle in your NetSuite environment:
Navigate to SuiteBundler
In your NetSuite account, go to:
Customization > SuiteBundler > Search and Install BundlesSearch for nsGPT Bundle
In the Keywords box, type nsGPT and press Enter
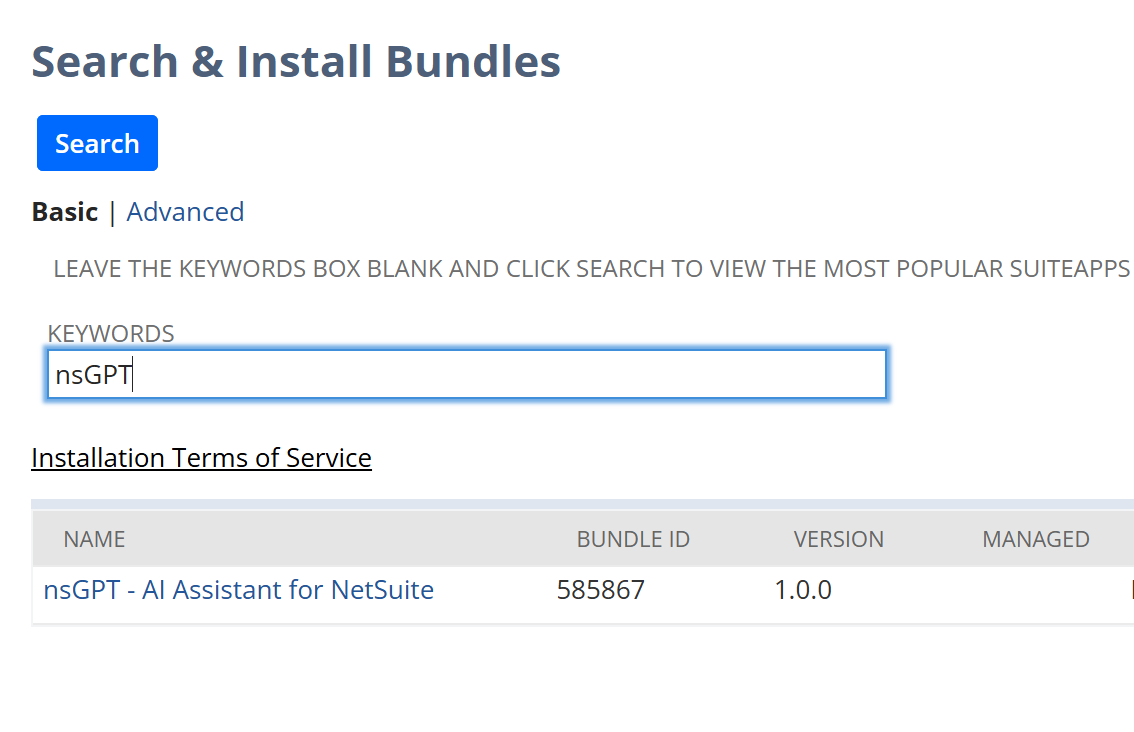
Search for the nsGPT bundle using keywords
Locate the Bundle
Look for:
nsGPT - AI Assistant for NetSuite
Bundle ID: 585867
Install the Bundle
Click the Install button and follow the on-screen prompts to complete the installation.
Important
Once the installation is complete, you may need to log out and log back in to NetSuite for the changes to take effect.
Accessing nsGPT
After installation and logging back in, you'll find nsGPT in your NetSuite navigation:
Find the AI Center Tab
Look for the "AI" Center Tab in your navigation bar at the top of your NetSuite interface.
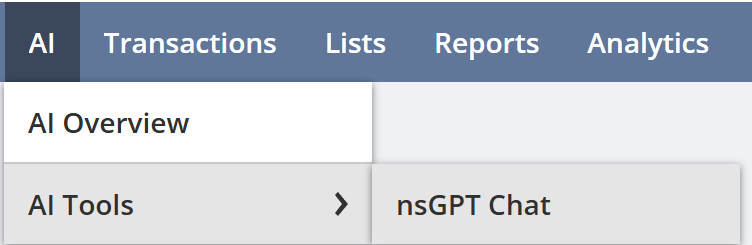
The AI tab will appear in your main navigation bar
Open nsGPT Chat
Navigate to:
AI > AI Tool > nsGPT ChatThis will open the nsGPT chat interface where you can start interacting with your AI assistant.
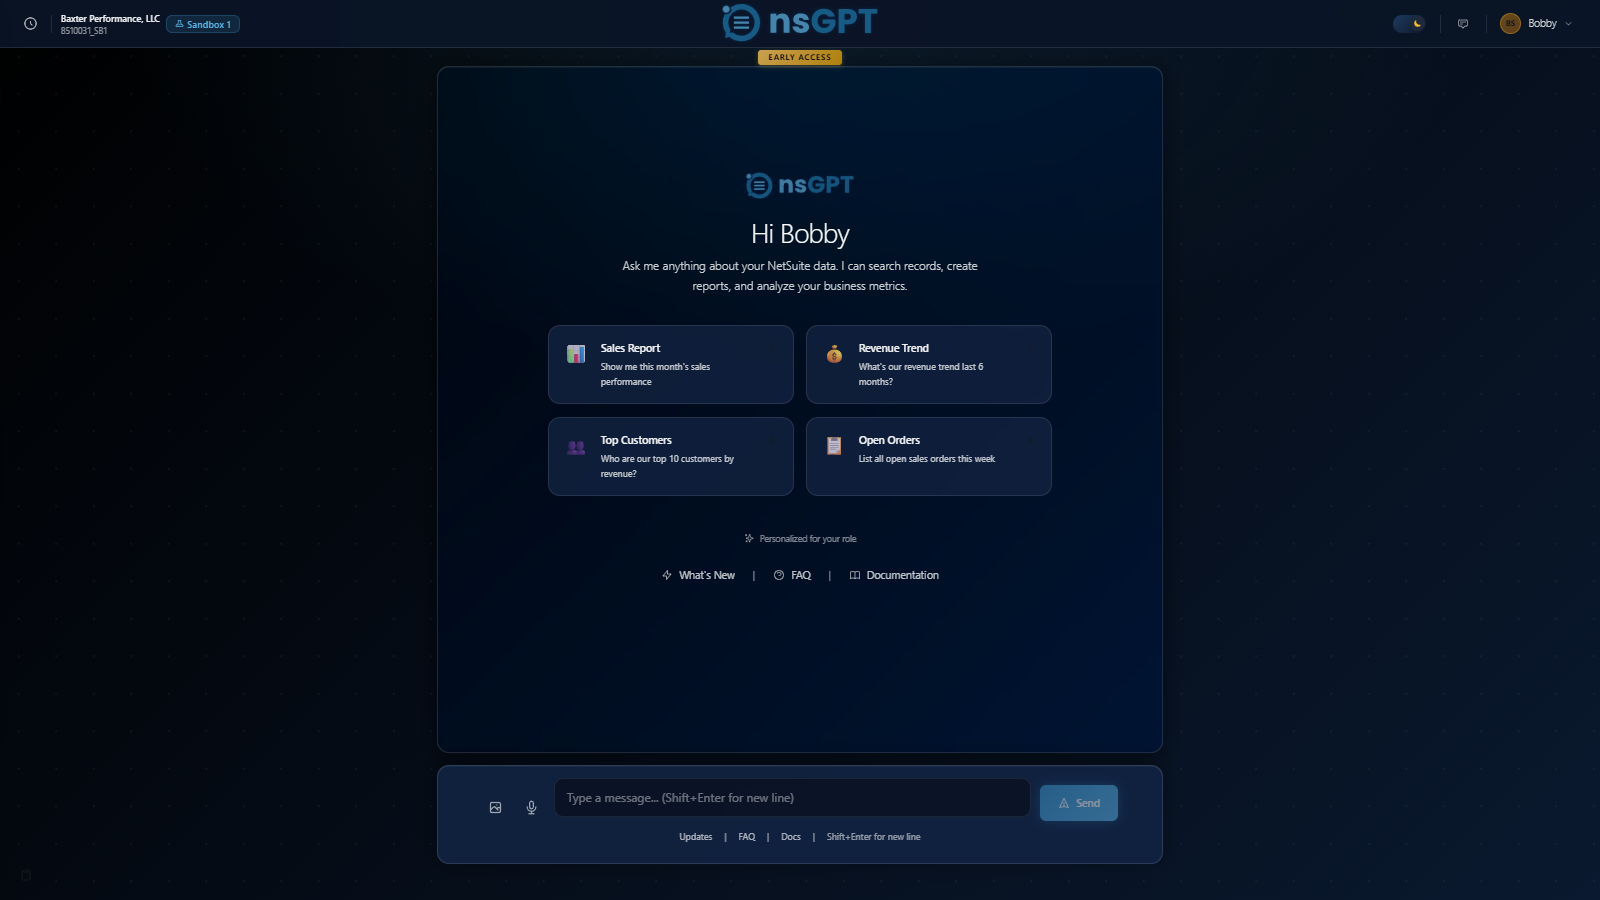
Start Using nsGPT
You're all set! Start asking nsGPT questions about your NetSuite data, request reports, generate charts, and automate your workflows.
You're Ready!
You're all set! Try asking nsGPT: "Show me sales trends for the last quarter" or "What are my top 10 customers?"
Quick Start Guide
Get familiar with the nsGPT interface and start asking questions in minutes.
The Interface
Here's an overview of the main nsGPT interface and its key components:
Your First Query
Try one of these example questions to see nsGPT in action:
"Show me our top 10 customers by revenue this year"
Get instant insights from your sales data
"What invoices are overdue more than 30 days?"
Monitor accounts receivable at a glance
"Create a chart of monthly sales for the last 6 months"
Visualize trends without building reports
"Look up customer Acme Corp and show their order history"
Quick customer lookups before calls
Pro Tips
Be Conversational
Ask questions naturally, like you would to a colleague. nsGPT understands context and follow-up questions.
Use Date Ranges
Specify timeframes like "last quarter", "this month", or "year to date" for more relevant results.
Enable Extended Thinking
For complex multi-step queries or large datasets, turn on extended thinking for more thorough analysis.
Ask for Charts
Request visualizations by saying "show me a chart of..." or "create a graph comparing..."
Features
Discover the powerful capabilities that make nsGPT your ultimate NetSuite assistant.
Charts & Visualizations
Turn your NetSuite data into stunning interactive charts with a simple request. nsGPT automatically generates visualizations from numeric data, making it easy to spot trends and patterns.
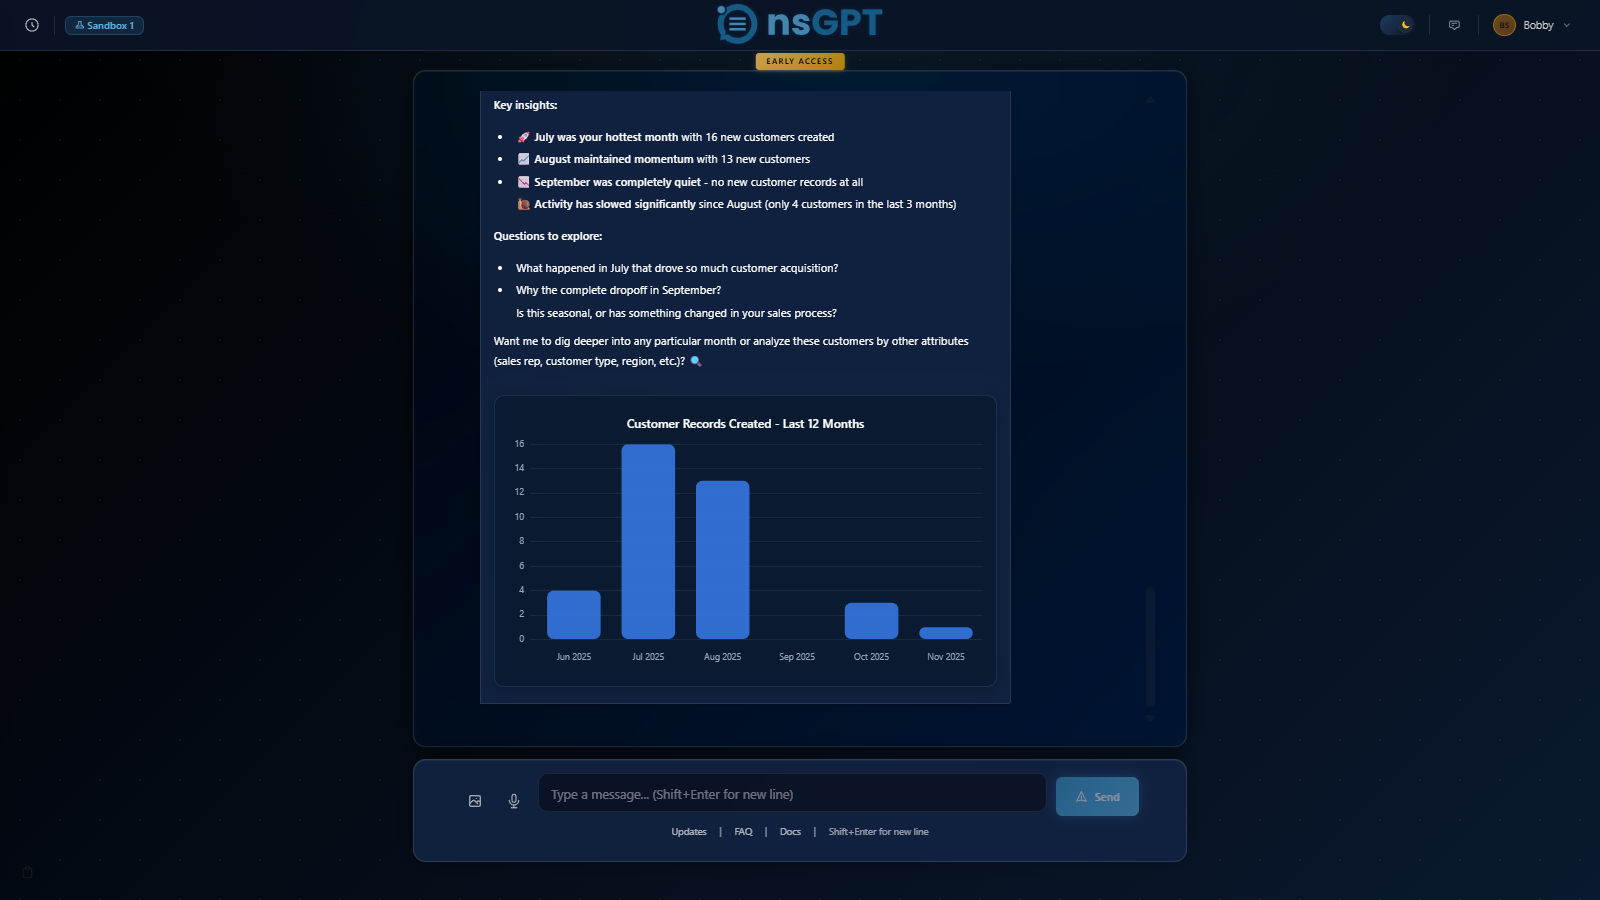
Interactive charts generated directly from your NetSuite data
Supported Chart Types
Try It
"Show me a bar chart of sales by region for this quarter"
Image Upload & Processing
Upload invoices, receipts, purchase orders, or any business document and let nsGPT extract the data for you. It can even create NetSuite records from uploaded images.
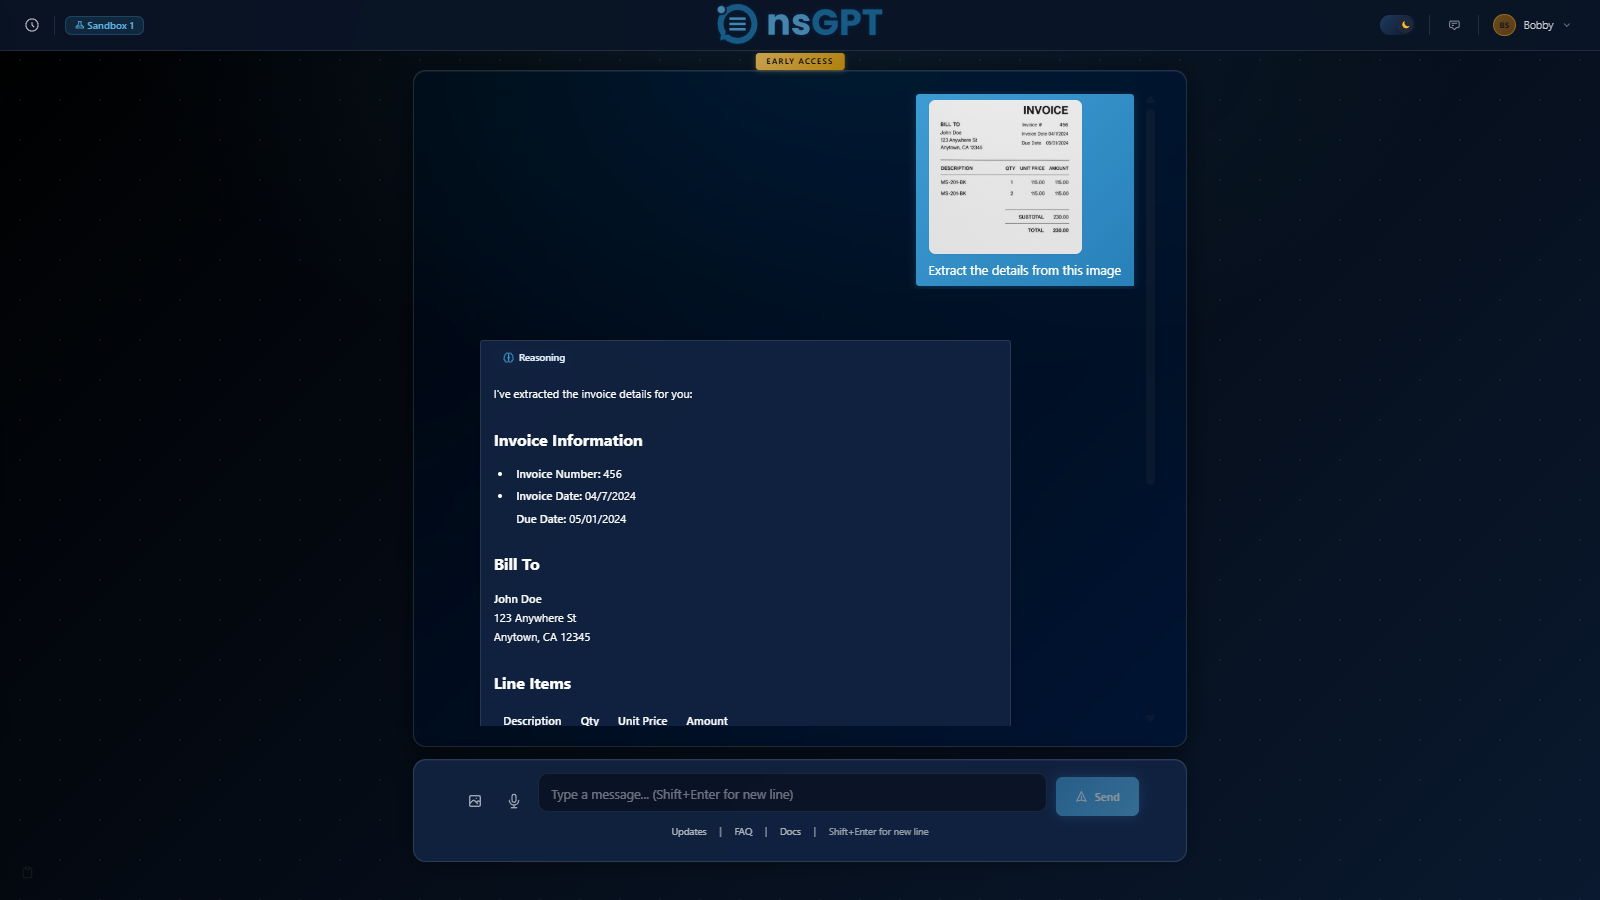
Upload documents and have nsGPT extract data automatically
What You Can Upload
Try It
Upload an invoice image and say "Create a vendor bill from this invoice"
Voice Input
Speak your questions hands-free instead of typing. Perfect for when you're multitasking or need quick answers without stopping your workflow.
How It Works
- Click the microphone button in the chat input
- Speak your question naturally
- nsGPT transcribes and processes your request
- Get your answer in seconds
Try It
Click the microphone and say "What are my open sales orders?"
Conversation History
All your conversations are automatically saved and easily searchable. Return to previous discussions, find past answers, and pick up right where you left off.
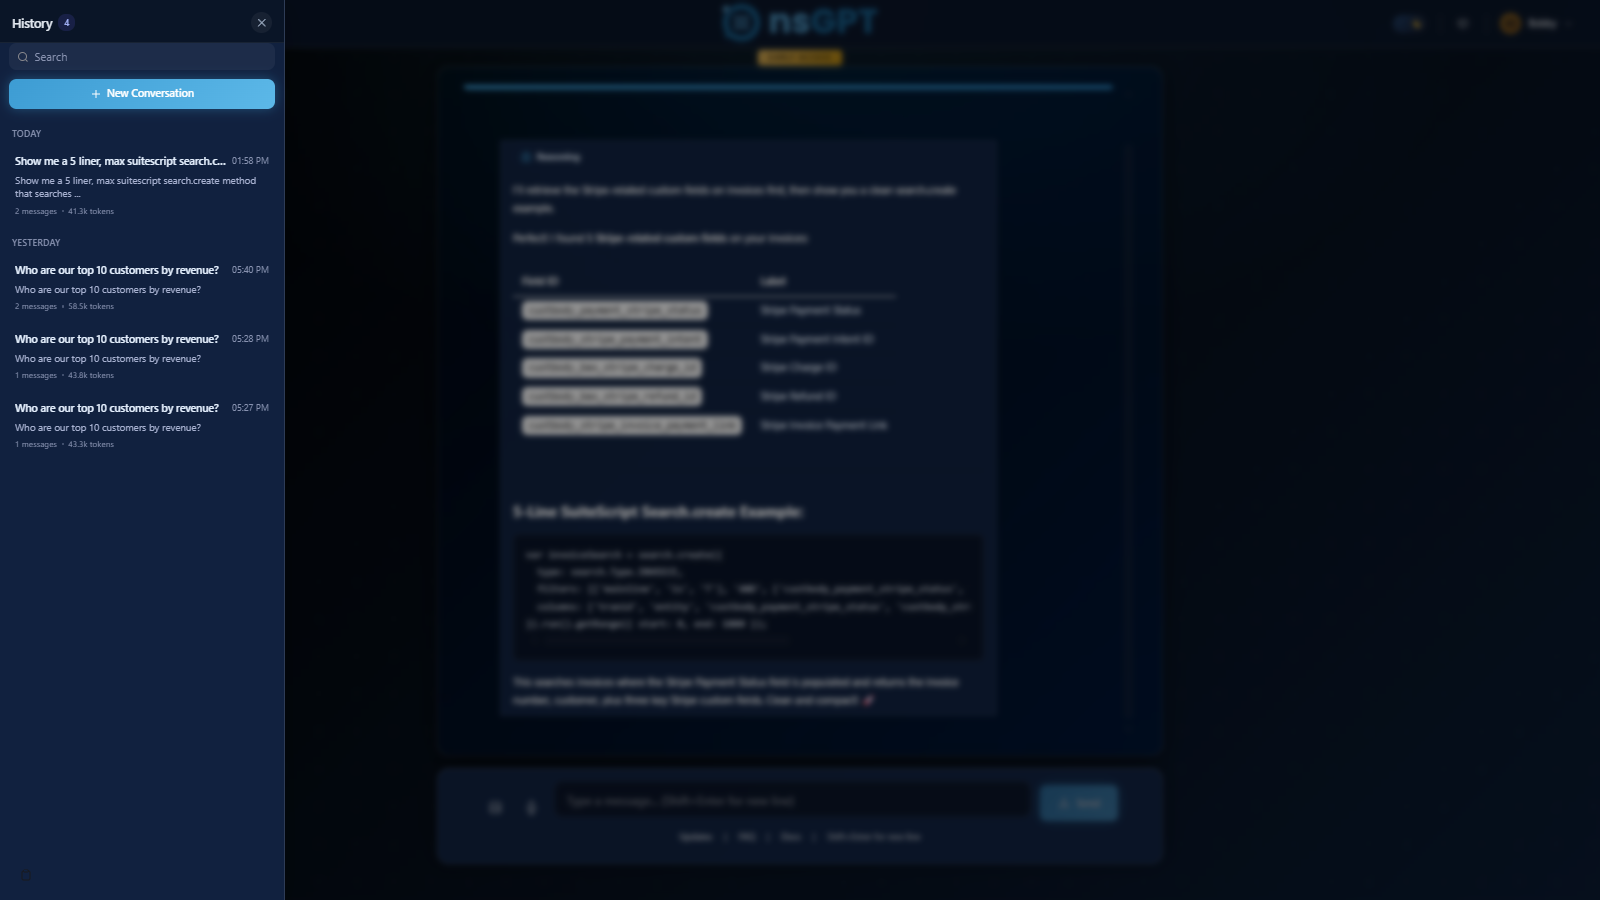
Browse and search your conversation history
History Features
Try It
Click the History button to browse your past conversations
Smart Code Generation
Stop hunting for field IDs and API documentation. nsGPT automatically discovers your custom fields, record types, and script IDs, then generates ready-to-use SuiteScript code with the correct identifiers already filled in.
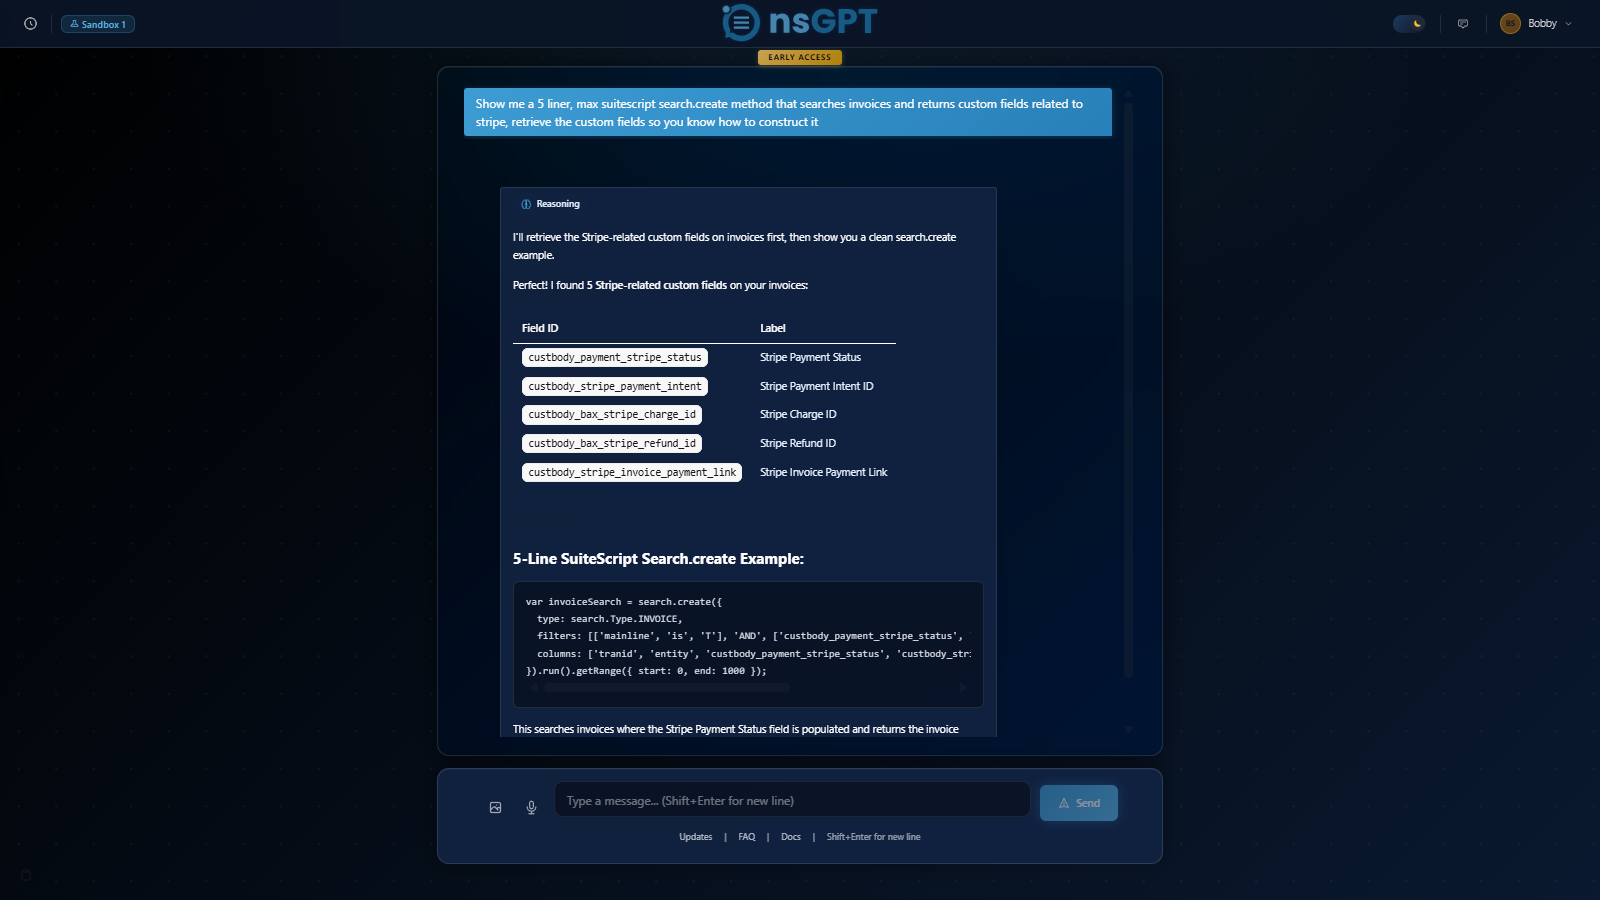
Custom field IDs automatically discovered and included in your code
What Makes It Smart
Try It
"Write a user event script that sets the custom field values on a sales order"
Submitting Feedback
Your feedback helps make nsGPT better for everyone. Whether you've found a bug, have a feature request, or just want to share your experience, we want to hear from you.
How to Submit Feedback
- Click the Feedback button in the top-right corner of nsGPT
- Select the type of feedback: Bug Report, Feature Request, or General Feedback
- Describe your feedback in detail
- Click Submit to send it to our team
Types of Feedback
Your Feedback Matters
Every piece of feedback is reviewed by our team. Bug reports help us fix issues quickly, feature requests shape our roadmap, and your suggestions help us understand how to make nsGPT more valuable for your workflow.
Try It
Click the Feedback button and let us know how nsGPT is working for you!
Administration
The nsGPT Configuration page is your central hub for managing licenses, users, trial status, and environment settings.
Accessing the Admin Panel
The nsGPT Configuration page is accessed directly from NetSuite's navigation menu:
AI > AI Tools > nsGPT Config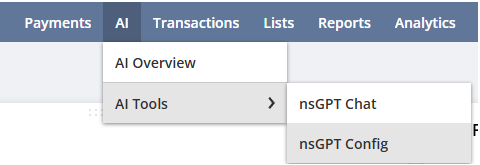
Access nsGPT Config from the AI menu in NetSuite
The Configuration page contains four collapsible sections:
- License Dashboard - View your license usage and availability
- Trial Status - Check your trial period and upgrade options
- Environment Settings - Select which NetSuite environment nsGPT is active in
- Add Users - Grant nsGPT access to employees, roles, or departments
At the bottom of the page, you'll see a list of Current nsGPT Users showing all users who have been granted access, along with their email, assignment date, and status.
License Dashboard
The License Dashboard shows you how many nsGPT licenses are being used and how many are available in your plan.

License Dashboard showing usage across your organization
Dashboard Elements
Need More Licenses?
If you've used all your available licenses and need to add more users, contact support@nsgpt.io to upgrade your plan.
Trial Status
The Trial Status section shows when your free trial ends and how to upgrade or extend your subscription.
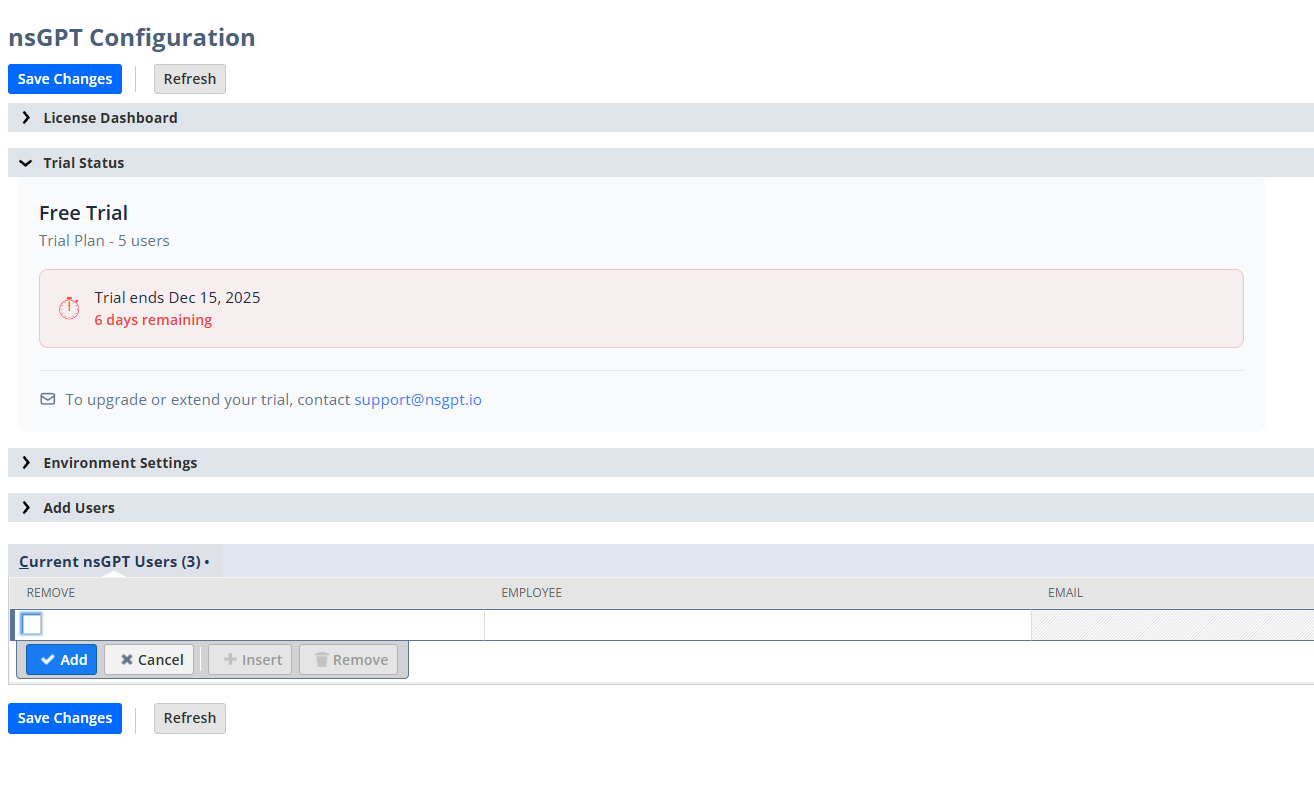
Trial Status showing remaining days and upgrade options
Trial Information
Ready to upgrade?
To upgrade or extend your trial, contact support@nsgpt.io and we'll help you find the right plan for your team.
Environment Settings
Environment Settings lets you control which NetSuite environment nsGPT is currently active in. You can switch between Production and any of your Sandbox environments.
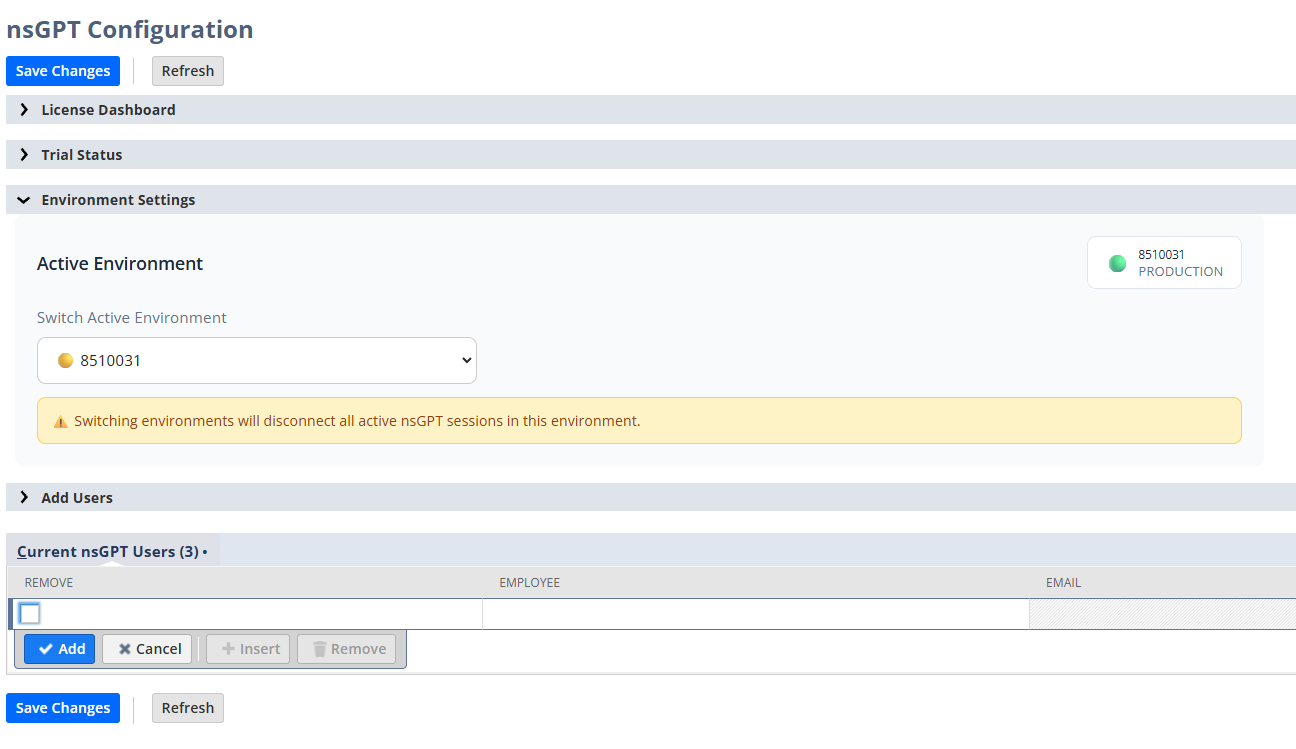
Switch between Production and Sandbox environments
Active Environment
The current active environment is displayed with a green indicator. nsGPT can only be active in one environment at a time.
Switching Environments
Use the Switch Active Environment dropdown to select a different NetSuite environment. Your available environments (Production, Sandbox1, Sandbox2, etc.) will appear in the dropdown.
Important: Switching Disconnects Active Sessions
Switching environments will disconnect all active nsGPT sessions in the current environment. Users will need to refresh their browser to reconnect in the new environment. Coordinate with your team before switching during business hours.
Why Switch Environments?
Add Users
The Add Users section allows you to grant nsGPT access to NetSuite users. You can add users individually by employee, or in bulk by role or department.
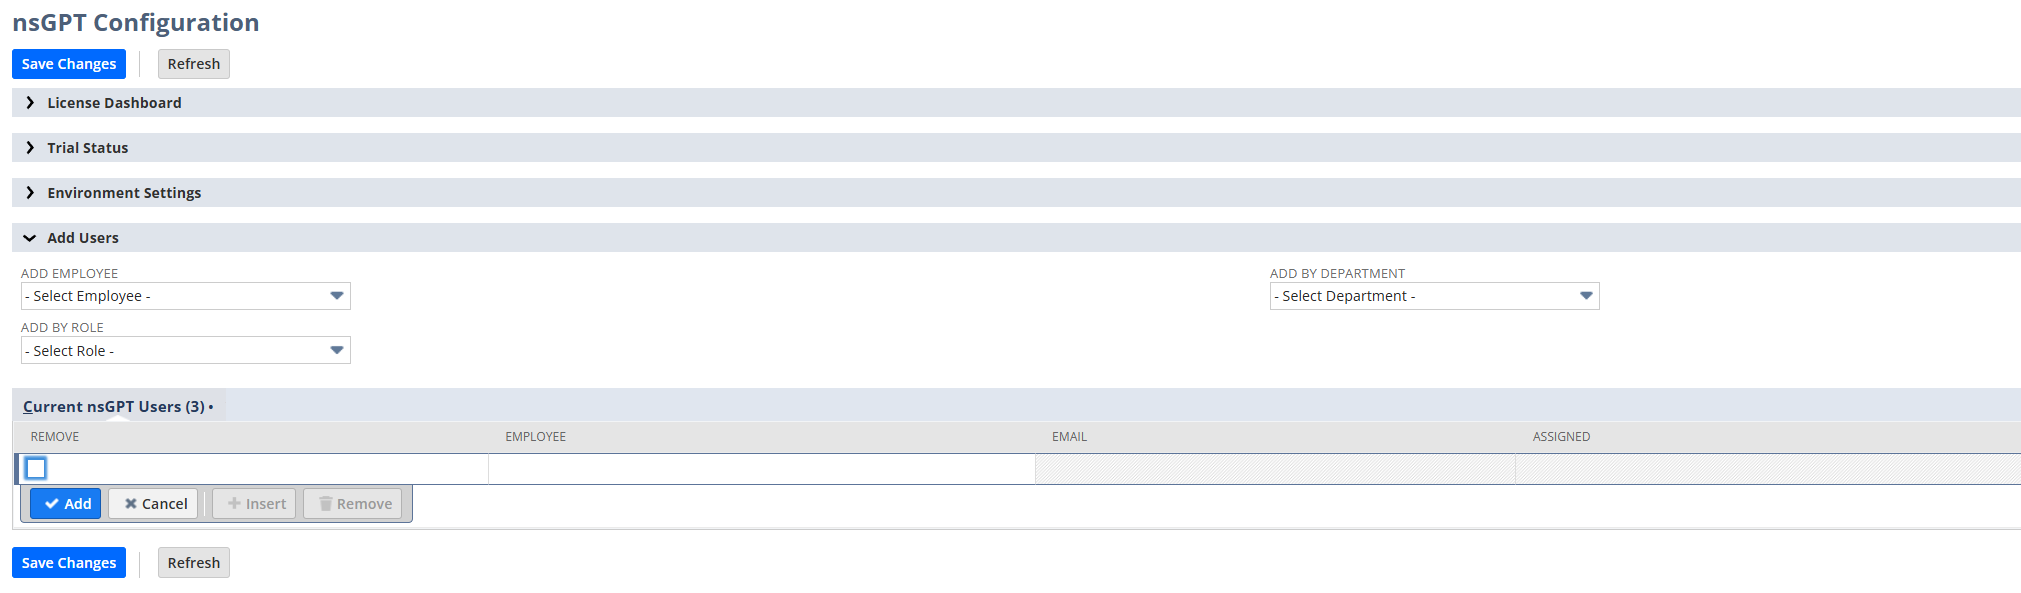
Add users by Employee, Role, or Department
Ways to Add Users
Current nsGPT Users
Below the Add Users section, you'll see a table of all users who currently have nsGPT access:
- Employee - The user's name
- Email - The user's email address
- Assigned - The date the user was granted access
- Status - Shows "Active" for users with current access
- Remove - Checkbox to remove a user's access
Managing Users
To add or remove users:
Use the dropdowns to select employees, roles, or departments to add
Check the Remove box next to any users you want to remove
Click Save Changes to apply your updates
License Limits
You can only add users up to your plan's license limit. If you need to add more users, remove inactive users or upgrade your plan by contacting support@nsgpt.io.
Need Help?
If you encounter any issues during installation or have questions about using nsGPT, we're here to help.